How to install Paloalto Firewall on GNS3 and create your first test lab
In today's globalized era, network security has become the most important factor for effective system administration. By enhancing your network security strategies in a company network, you will able to mitigate and decrease the chance of privacy spoofing, identity or information theft. Whatever the size of your corporate network, you need to ensure network protection against malicious attacks. Among those corporate networks consists of data centers and they have been storing millions and trillions of data. When considering these types of security, their job is to protect and safeguard the data from falling into wrong hands. To implement, maintain and administration on these types of networks, you have to have hands-on experience, practice and interact with incidents regards to network security.

We recommend to get hands-on experience on every vendor such as Cisco, PaltoAlto, Checkpoint, Fortigate and etc. Then no matter about the size of the company and its infrastructure, you can easily adapt to administrate the network security. When you plan to follow PaloAlto certification, now you can implement a test lab in GNS3 as we are doing for Cisco ASA. There are many videos and tutorials to implement the ASA lab. However, when I was reading for the PaloAlto exam, I couldn't find certain and accurate guidance to implement a lab. Buying a firewall is not practical and you have to waste extra expense. However, once you finish your studies, you will keep it in your storeroom and never use it again. Hence, don't waste money to buy a real one. Let's build a virtual lab with GNS3.
Minimum Requirements
- In my case, I have installed GNS3 1.3.11 version on my laptop Windows 7 (64-bit), 8 GB RAM. Physical memory is the most important because to run the PaloAlto, you need at least 4 GB RAM to load the firewall web console.
- I have used, PaloAlto VM ESX (PA-VM-ESX-6.1.0) and installed it on a Virtual Box (VirtualBox Software).
PaloAlto (PA), Settings in VirtualBox
- General
- Type - Linux
- Version - Red Hat (64 bit)
- System
- Motherboard
- RAM (4 GB minimum)
- Chipset - PIIX3
- Extended Features - Enable I/O APIC
- Processor
- Processors - 2
- Execution Cap - 100%
- Extended Features - Enable PAE/NX
- Acceleration
- Paravirtualization Interface - Default
- Hardware Virtualization - Enable VT-x/AMD-V & Enable Nested Paging.
- Network - This is very important when you are going to deal with PA interfaces. According to the practical perspective, these interfaces cannot be seen. However, if you create the interface for PA carefully by following correct guidelines, you can proceed to create your lab without any hesitation. Let's see what the procedure to create the network interfaces.


Now you have successfully configured the management interface. Now let's create other network adapters. In VirtualBox, navigate to File > Preferences > Network. After adding the network adapters, we can use it as inside/outside or DMZ interfaces. You don't want to configure those adapters and keep them with their default configuration.


GNS3 Topology - Drag and drop the devices from GNS3 and create the lab as mentioned in the topology diagram.

Start the PA appliance and use admin for both username and password to log in. To check the management IP address, enter 'show interface management' command.

Here you have to consider the IP address given. Go to the network adapter we have been discussed earlier and configure the IP address.

Now you will able to login to PA firewall web console via https://10.67.78.91/php/login.php

Create a Virtual Router

Create a Zone

Create an Interface


Add a management profile > After configuring this feature enables ping to the interface.


How to save the configuration? Press the commit button to continue.

Switch Configuration

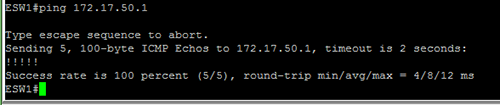
Now you able to ping to PA inside interface successfully. Follows these step by step procedure to configure the lab. If you have any doubts regards to the implementation, please don't hesitate to ask. You all are welcome to comment and mention your questions and problems in our comment section below. We will support you to troubleshoot and solve your problems.
Cheers!


No comments